Working with CodeSandbox
The following sections will cover how to use CodeSandbox within this course. You'll encounter CodeSandbox in many lab activities and assignments, so it is important to familiarize yourself with the platform. Use this page as a reference when you need to review important steps and features.
Creating an Account
🔷 Click here to expand or collapse this section.
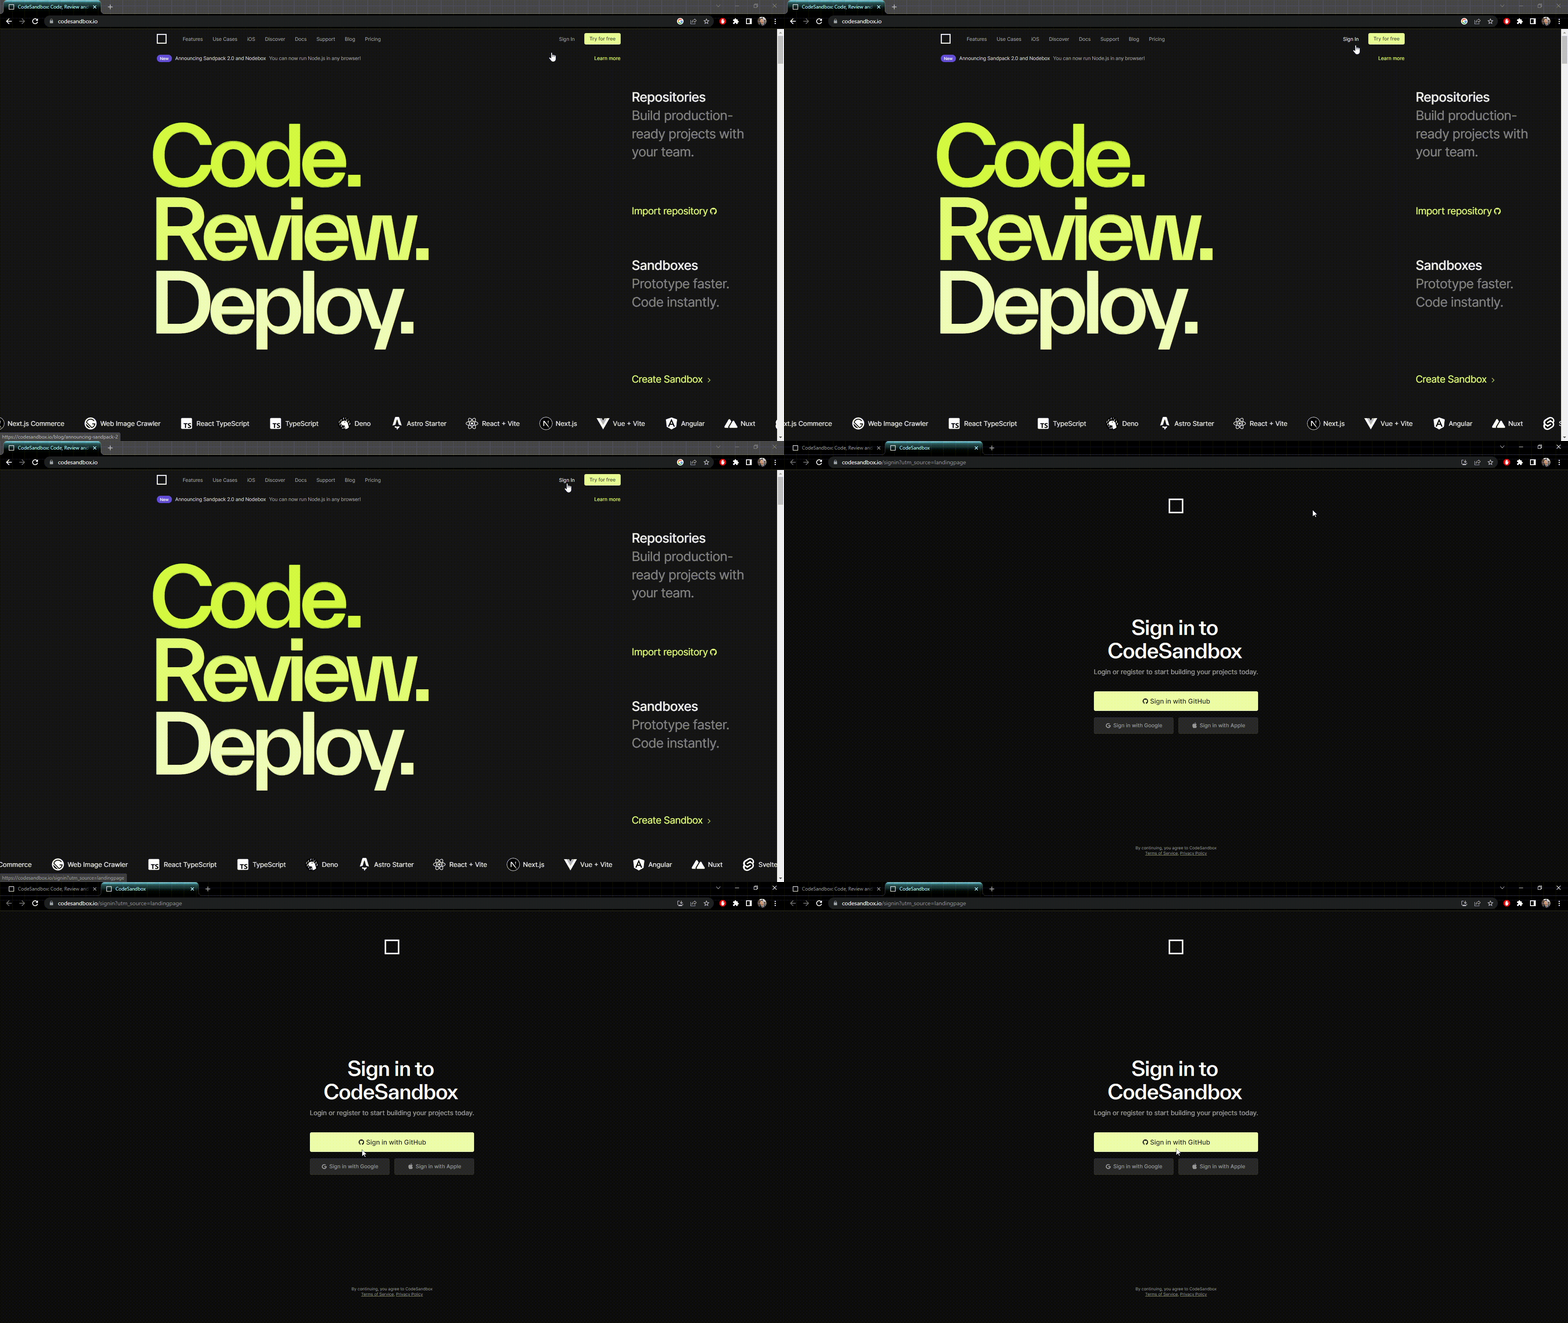
- Go to the CodeSandbox Website.
- Click "
Sign In" in the upper right corner. - Click "
Sign in with GitHub." If you have not yet created a GitHub account, do so before continuing.

Creating a Sandbox
🔷 Click here to expand or collapse this section.
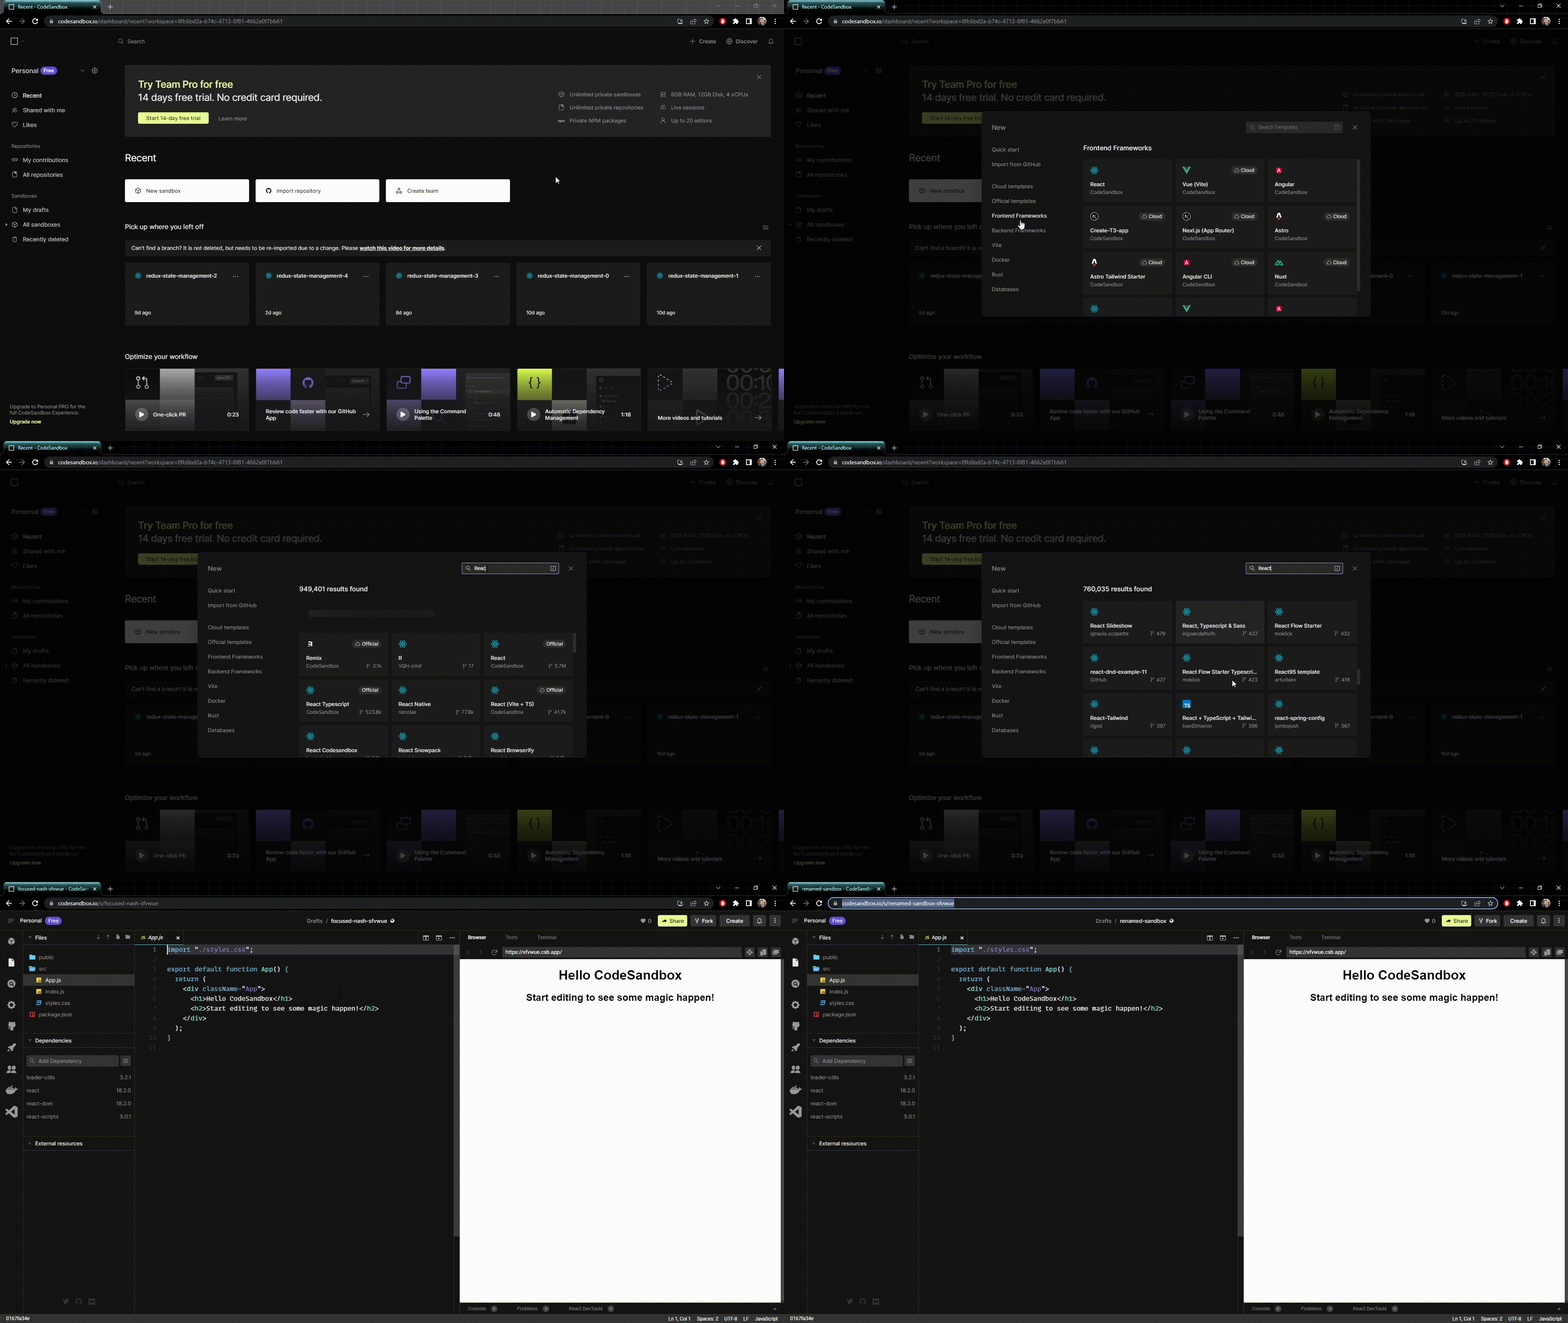
- Go to your CodeSandbox Dashboard.
- Click "
+ Create" in the upper right corner. -
Browse through the available options, or use the search feature to find the type of sandbox you are looking for.
- The instructions for your assignment should indicate what type of sandbox is to be used. If you are uncertain, consult your instructor.
-
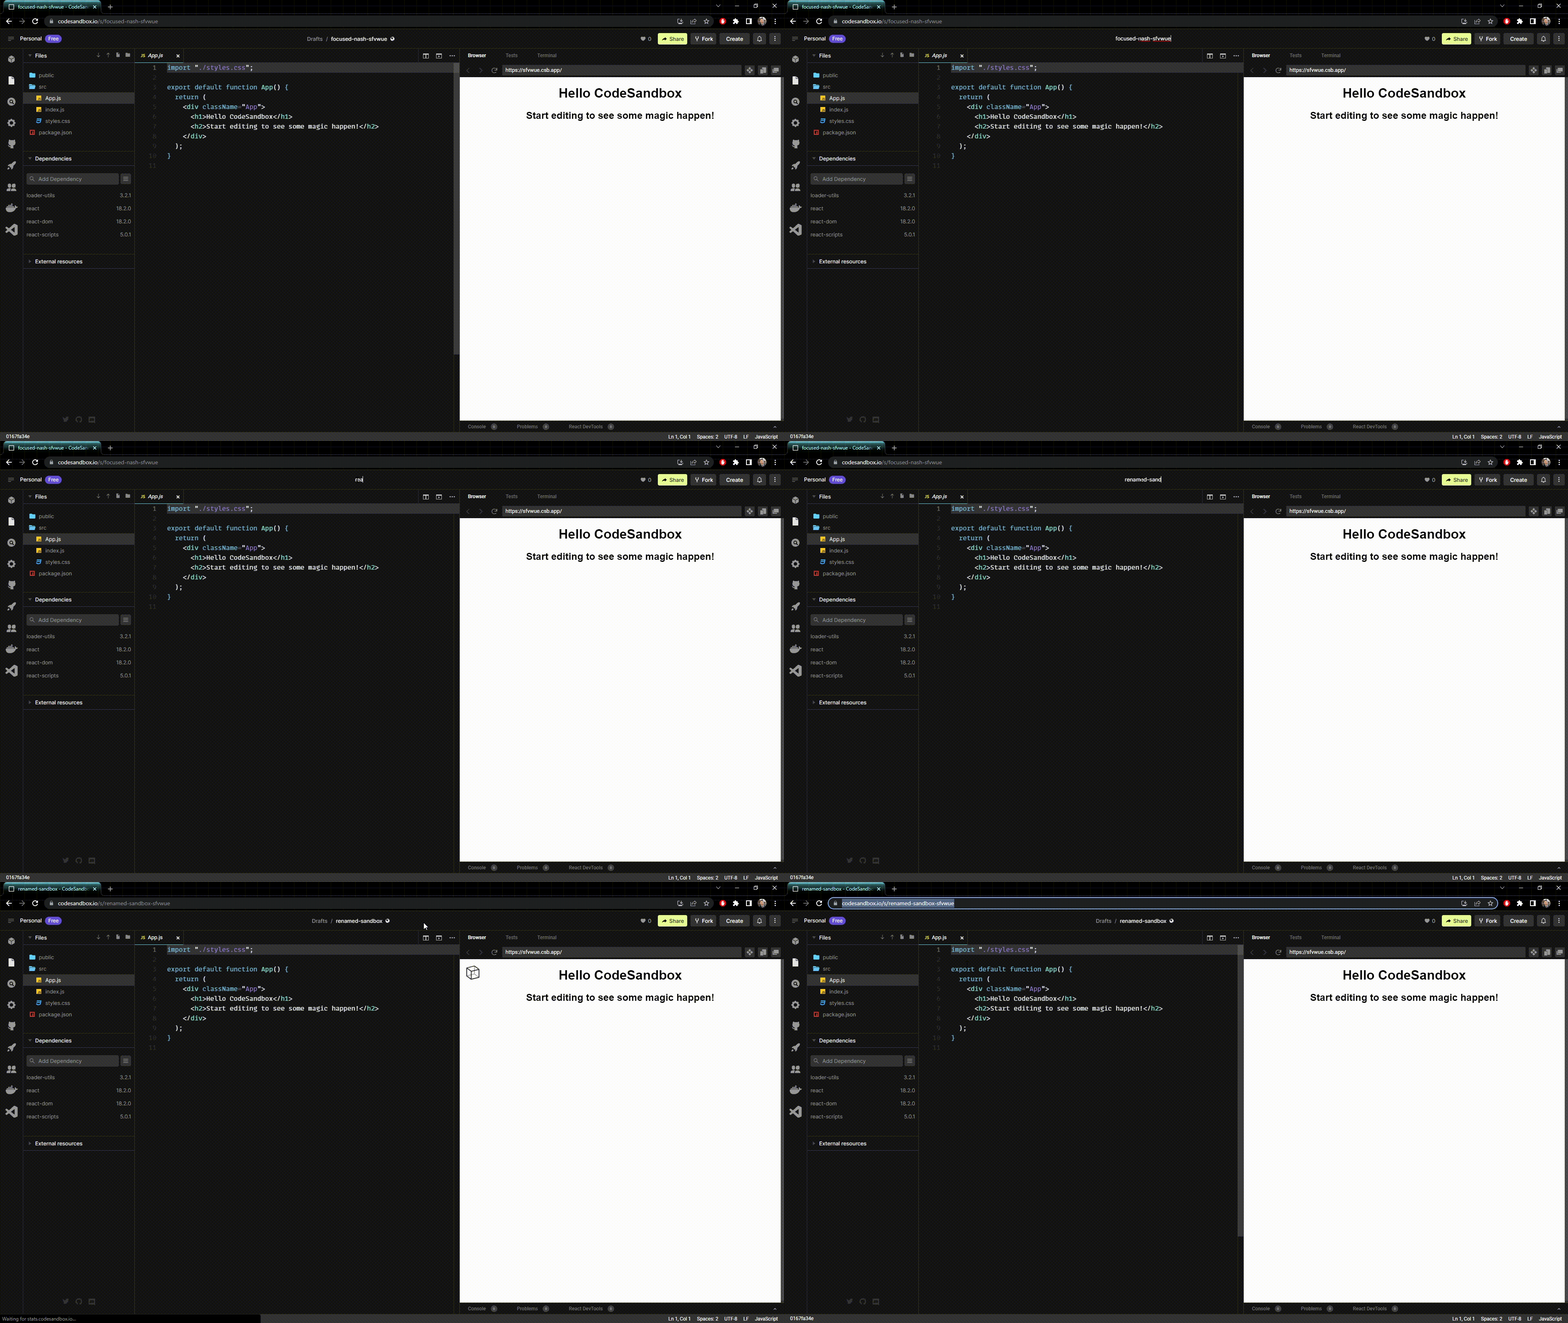
Once your sandbox has been created, you can (and should) rename it.
- Double-click on the current, pre-generated name at the top center of the sandbox.
- Type a new name for the sandbox (which is often given in the assignment instructions, and should be descriptive).
- The URL for your sandbox should automatically update to reflect your changes.

Navigating your Sandbox
🔷 Click here to expand or collapse this section.
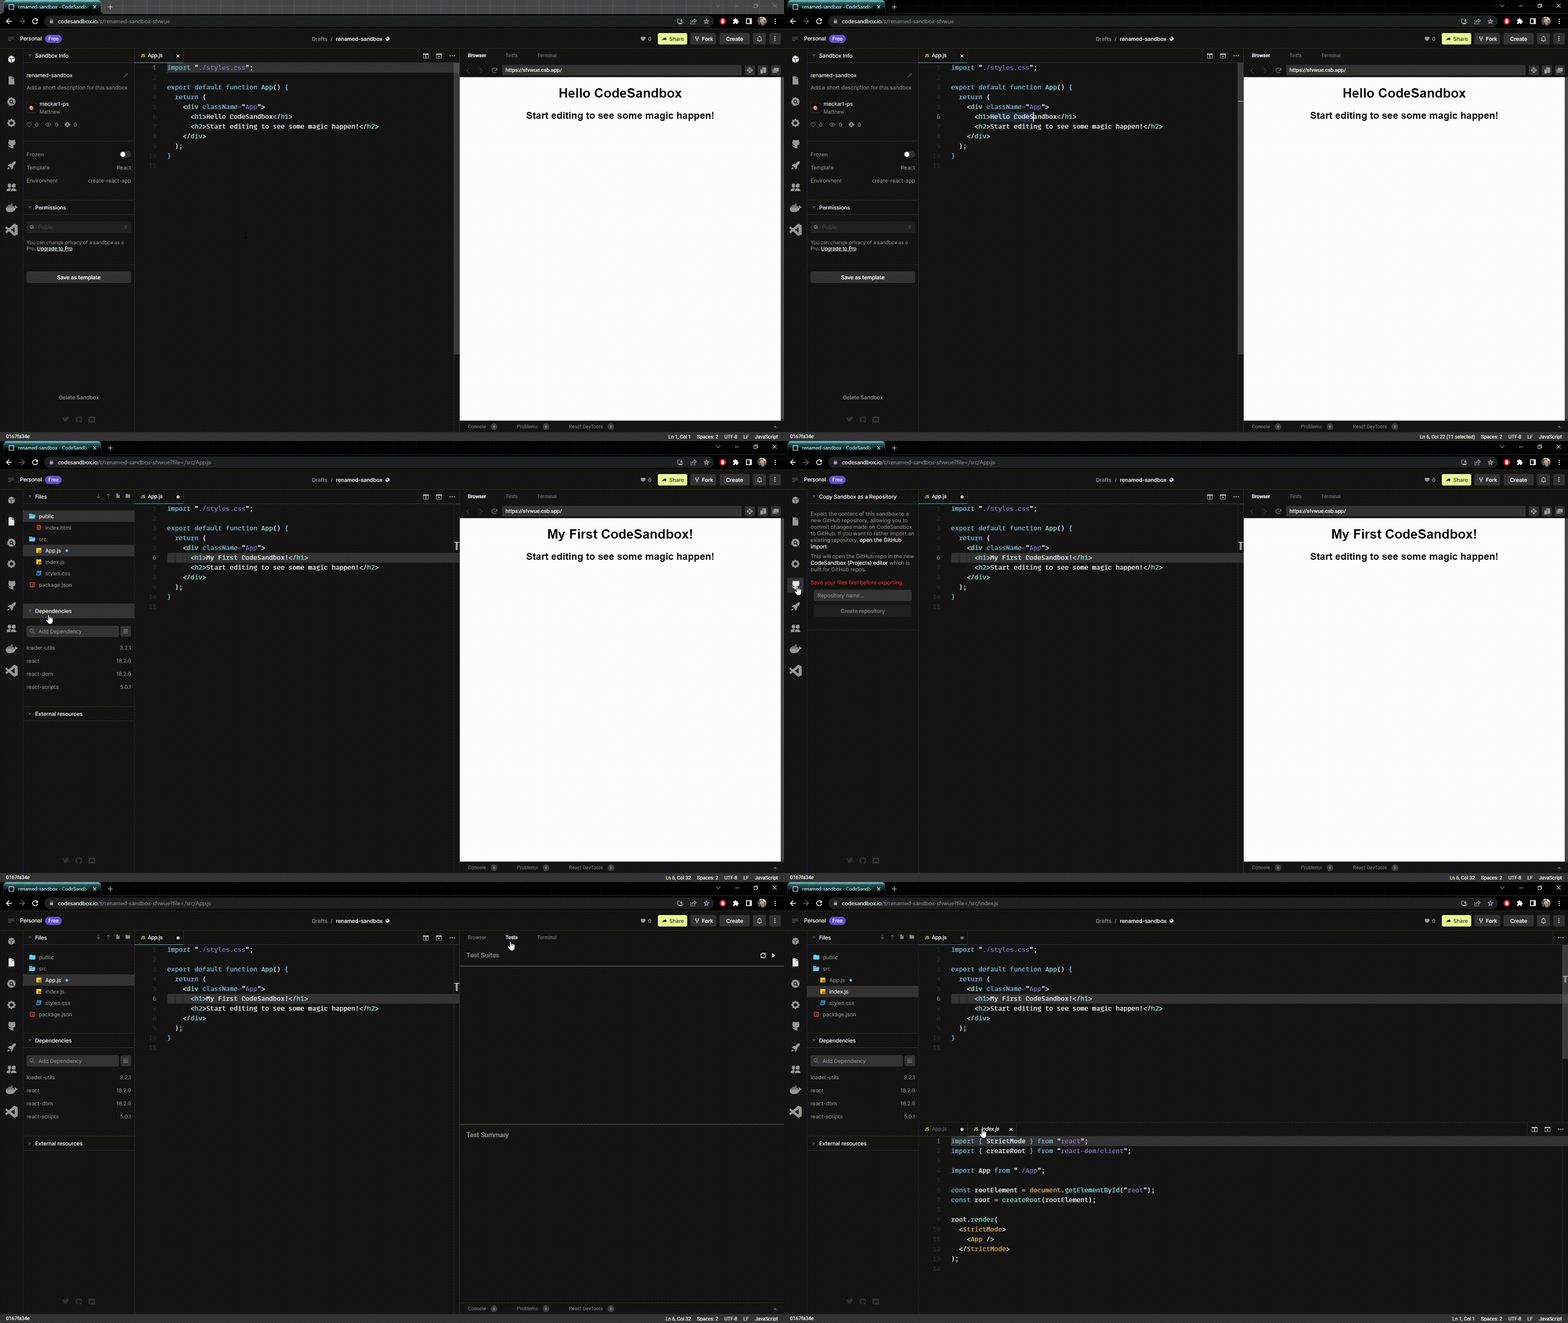
- Your CodeSandbox has most of the features of a traditional code editor. Take a moment to explore them.
- Like most roadblocks in programming, any confusion you encounter can likely be solved by visiting the documentation.
Note: Depending on the configuration of your sandbox, it may look different than the example below.
The central panels of your sandbox provide a traditional code editor. Here, you will have a variety of display options depending on the configuration of your sandbox, including previews, testing, terminals, split-screen editors, and more.
Within your file browser, you can add folders and files just like you would on your local machine. You can also quickly add dependancies and external resources to your project using the tools provided there.

Uploading to Canvas
🔷 Click here to expand or collapse this section.
- Go to your CodeSandbox project.
-
If you have not yet renamed your sandbox according to the assignment instructions, do so now.
- Double-click on the current, pre-generated name at the top center of the sandbox.
- Type a new name for the sandbox (which is often given in the assignment instructions, and should be descriptive).
- The URL for your sandbox should automatically update to reflect your changes.
- Copy the URL to your sandbox, and submit this link on the Canvas assignment page.

