
308A.2 - Classes and Object-Oriented Programming
Learning Objectives
By the end of this lesson, learners should be able to:
- Describe the use case for classes.
- Define and instantiate a class.
- Include and use a constructor method within a class.
- Recognize constructor functions (the predecessor to classes).
- Describe inheritance, encapsulation, abstraction, and polymorphism.
- Demonstrate the use of inheritance, encapsulation, abstraction, and polymorphism in JavaScript.
- Define static class methods and properties.
- Define object prototypes.
- Assign and manipulate object prototypes.
- Create factory functions for objects.
Lesson Setup
For this lesson, we're going to code along using a Vanilla CodeSandbox - you can name it "JavaScript Classes Practice".
CodeSandbox
This lesson uses CodeSandbox as one of its tools.
If you are unfamiliar with CodeSandbox, or need a refresher, please visit our reference page on CodeSandbox for instructions on:
- Creating an Account
- Making a Sandbox
- Navigating your Sandbox
- Submitting a link to your Sandbox to Canvas
Object-Oriented Programming
We have already touched on some Object-Oriented Programming (OOP) concepts, but in this lesson we will dive into the details of the four key principles of OOP:
- Inheritance
- Encapsulation
- Abstraction
- Polymorphism
Object-oriented programming as a paradigm is useful on large-scale projects because it helps modularize code and improve organization. The core idea behind OOP is to separate concerns and responsibilities into individual object entities, much like functions separate reusable actions into specific entities.
The this Keyword and Object Methods
In order to work with objects and classes, you need to understand the this keyword.
this behaves differently in different contexts, and we are only going to examine it in a function or constructor context during this lesson. For further learning on how the this keyword behaves in other situations, read through the MDN documentation.
Within a function, the value of this depends on how the function is called. Typically, the value of this is the object that the function is accessed on. For example, if you call the function obj.functionCall(), the value of this within the body of functionCall() is obj.
When we attach functions to objects (creating methods), we can use this to easily reference the other properties or methods within that specific object.
In the following example, we create a person object and an introduce function. We could add parameters to our introduce function and pass the object's properties in as arguments each time we call the function, or we could make use of the this keyword:
const person = {
  name: {
    first: 'Elyan',
    last: 'Kemble',
  },
  age: 32,
  location: {
    city: 'Garland',
    state: 'Texas',
    zip: 75040
  },
  occupation: 'Front-End Developer'
}

function introduce() {
  console.log(`Hello, my name is ${this.name.first} ${this.name.last}, and I'm a ${this.age}-year-old ${this.occupation} from ${this.location.city}, ${this.location.state}!`);
}
If we were to simply call introduce() at this point, we would get: "Hello, my name is undefined undefined, and I'm a undefined-year-old undefined from undefined, undefined!" First, we need to set our function to be a method of the person object, and then call that method from the object itself.
person.introduce = introduce;

person.introduce();
Now if we take a look at the console, we have logged: "Hello, my name is Elyan Kemble, and I'm a 32-year-old Front-End Developer from Garland, Texas!"
Success!
If we wanted to, we could also have included the function within our original object as a method, like so:
const person = {
  name: {
    first: 'Elyan',
    last: 'Kemble',
  },
  age: 32,
  location: {
    city: 'Garland',
    state: 'Texas',
    zip: 75040
  },
  occupation: 'Front-End Developer',
  introduce() {
    console.log(`Hello, my name is ${this.name.first} ${this.name.last}, and I'm a ${this.age}-year-old ${this.occupation} from ${this.location.city}, ${this.location.state}!`);
  }
}

person.introduce();
Doing this allows us to skip a step, but what if we had multiple person objects that we wanted to add introduce to? Either we include introduce() in every object we create, or we assign it to every object individually after creation. Neither of these approaches are efficient, which is why we need classes.
Classes
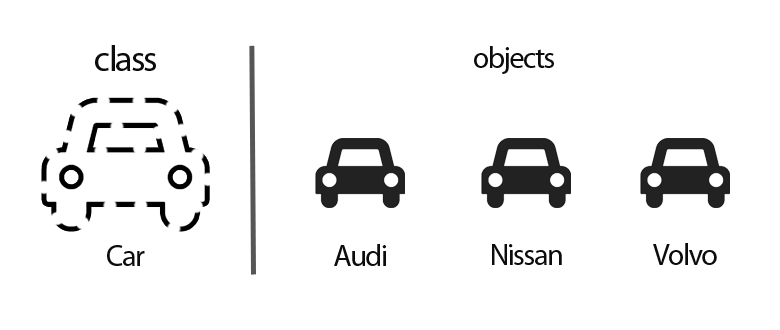
In object oriented programming (OOP), we use objects to model our application's purpose. Just like functions help us create reusable actions (or "verbs" in our previous analogies), classes help us create reusable objects (or "nouns").
Classes (as well as their predecessor, constructor functions) are used to create objects. Think of classes as the blueprints used to create objects of a certain "type".
For instance, if we were working with a lot of "car" objects, wouldn't it be nice to have a template that gives them all the same properties and methods?
We've already been creating JS objects using object notation, so why do we need classes and/or constructor functions?
- The number of a certain type of object needed by an application often varies at runtime.
- Classes/constructors provide a convenient way to dynamically create objects as needed.
Let's look at the use cases of Classes by examining the following code:
const cat1 = {
  eyes: 2,
  legs: 4,
  fur: "Orange",
  isAwake: true,
  isMoving: false,
  sleep() {
    this.isAwake = false;
  },
  wake() {
    this.isAwake = true;
  },
  sit() {
    this.isMoving = false;
  },
  walk() {
    this.isMoving = true;
  },
  speak() {
    console.log("Meow...");
  }
}

const cat2 = {
  eyes: 2,
  legs: 4,
  fur: "Black and White",
  isAwake: false,
  isMoving: false,
  sleep() {
    this.isAwake = false;
  },
  wake() {
    this.isAwake = true;
  },
  sit() {
    this.isMoving = false;
  },
  walk() {
    this.isMoving = true;
  },
  speak() {
    console.log("Meow...");
  }
}

const dog1 = {
  eyes: 2,
  legs: 4,
  fur: "Gold",
  isAwake: true,
  isMoving: true,
  sleep() {
    this.isAwake = false;
  },
  wake() {
    this.isAwake = true;
  },
  sit() {
    this.isMoving = false;
  },
  walk() {
    this.isMoving = true;
  },
  speak() {
    console.log("Woof!");
  }
}

const cow1 = {
  eyes: 2,
  legs: 4,
  hair: "Brown",
  isAwake: true,
  isMoving: false,
  sleep() {
    this.isAwake = false;
  },
  wake() {
    this.isAwake = true;
  },
  sit() {
    this.isMoving = false;
  },
  walk() {
    this.isMoving = true;
  },
  speak() {
    console.log("Moo.");
  }
}
As you're scrolling, I'm sure you've realized this could easily get out of hand. Imagine if we had to create an entire farm of animals this way. The amount of time it would take to type out, and the number of lines of code...
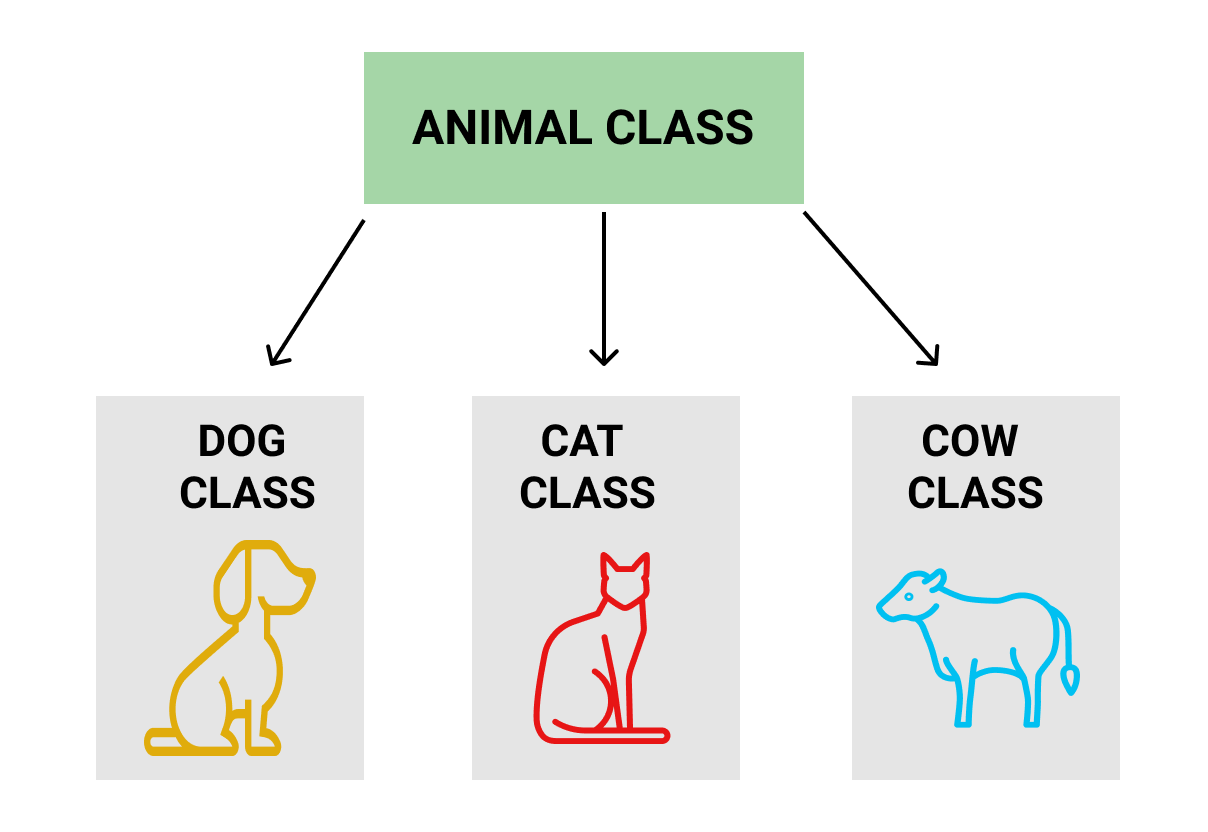
This is where classes save the day. Look at all of the shared characteristics among these objects! They all have the same properties and methods, with a few exceptions: cows have hair instead of fur, and each animal has a different speak() method.
Let's take all of these common traits and put them into a class called Animal. First, how do we create a class?
Defining Classes in JavaScript
Here's a minimal class definition that's good for nothing but creating empty objects:
class Animal {
  // Code to define the class's properties and methods
}
This looks similar to defining a function because classes are, in fact, special functions, except...
❓ What's different compared to a function?
❓ What's different about the naming convention?
Instantiating a Class
Here's a bit more OOP vocabulary for you:
- instance: An object created by a class.
- instantiate: We instantiate a class to create an object.
- instantiation: The process of creating an object.
In JS, we create objects using the new keyword when invoking (instantiating) the class:
const v1 = new Animal();The Constructor Method
When a class is being instantiated, the special constructor method in the class will automatically be called:
class Animal {
	constructor(eyes, legs, isAwake, isMoving) {
		this.eyes = eyes,
    this.legs = legs,
    this.isAwake = isAwake,
    this.isMoving = isMoving,
	  // return is not needed because the new object is returned by default
	}
}

const cat1 = new Animal(2, 4, true, false);
The purpose of the constructor method is to initialize the data properties of the new object being created (represented by this).
If there are no properties to initialize, the constructor method is optional (a hidden default constructor is called).
Object Instantiation
When we invoke the class prefaced with the new keyword, behind the scenes:
- JS creates a new object (empty) and assigns it to the
thiskeyword. - The
constructormethod is called with the arguments we provided when invoking the class. Remember, theconstructormethod is where we create/initialize properties on the new object assigned tothis. - After the
constructoris finished executing, the class automatically returns the new object. - Although the
constructormethod is special because it's called automatically, there's nothing special about how it's defined, other methods are defined the same way.
Defining Methods in a Class
We're still missing some of the functionality we had in our original objects, so we need to define some methods.
There are two types of methods that can be added to a class:
- Prototype (instance) methods
- Static (class) methods
Prototype methods are the most common, and are available to be called by any instance of the class.
For example, when you use Array.prototype.forEach you can only use that method on an instance of an Array:
const nums = [1,2,3];
nums.forEach((num) => {
  console.log(num);
})
Static methods are methods that are called on the class itself and cannot be called by instances.
For example, when you use Math.random you don't need to create an instance of Math first:
console.log(Math.random());We will discuss prototypes and static features in more detail later in this lesson.
Let's add the sleep, wake, sit, walk, and speak methods to our Animal class. For now, we'll pass a parameter into our speak method that defines what will be said; later, we'll demonstrate a better way of handling this.
class Animal {
	constructor(eyes, legs, isAwake, isMoving) {
		this.eyes = eyes;
    this.legs = legs;
    this.isAwake = isAwake;
    this.isMoving = isMoving;
	  // return is not needed because the new object is returned by default
	}
  sleep() {
    this.isAwake = false;
  }
  wake() {
    this.isAwake = true;
  }
  sit() {
    this.isMoving = false;
  }
  walk() {
    this.isMoving = true;
  }
  speak(sound) {
    console.log(sound);
  }
}
Note that unlike within object literals, methods are not separated by a comma.
Now, we have (almost) fully created our Animal class. If we wanted to instantiate all of the animals we had previously, we could do that with four lines of code!
const cat1 = new Animal(2, 4, true, false);
const cat2 = new Animal(2, 4, false, false);
const dog1 = new Animal(2, 4, true, true);
const cow1 = new Animal(2, 4, true, false);
Already, the benefits of classes are beginning to show themselves, and we've just scratched the surface.
We are still missing one of our properties, fur/hair, and the convenience provided by our custom speak() methods. In order to address these issues, we need to talk about one of the four key OOP concepts: inheritance.
Inheritance
Inheritance is the ability to create classes based on other classes. With inheritance, we can define a parent class that has certain properties and methods, and child classes that will inherit all of these properties and methods from their parent. The major benefit to inheritance is that those child classes can then add their own specific properties and methods, or override the parent's.
We use two new keywords to implement inheritance: extends and super.
The extends keyword declares what parent a child inherits from. For instance, we could create a new Cat class based on our Animal class by saying class Cat extends Animal. This is a sneak peek into how we'll be moving forward with our example.
Within the child class, you can access properties and methods of the parent by using the keyword super. We will demonstrate the use of this shortly.
If you are familiar with OOP in other langauges, note that JavaScript is different from class-based languages like Java or Python in that its inheritance implementation is prototype-based. We will discuss prototypes later within the lesson.
In JS, virtually every object inherits from the Object class and thus inherits its methods, such as toString:
cat1.toString() // outputs something like '[object Object]'If we define a method that already exists in the object hierarchy, we "override" it.
For example, we can override the Object's toString method by adding it to our Animal class:
// existing methods above
toString() {
  return `This Animal has ${this.eyes} eyes and ${this.legs} legs. It ${this.isAwake ? 'is' : 'is not'} awake, and ${this.isMoving ? 'is' : 'is not'} moving.`;
}
Test it out by calling cat1.toString().
Let's use these concepts of inheritance to expand upon our animals example by creating subclasses (child classes) for Cat, Dog, and Cow. There are some important things to take note of in the code below, which we will elaborate on after the code block.
class Animal {
	constructor(eyes, legs, isAwake, isMoving) {
		this.eyes = eyes;
    this.legs = legs;
    this.isAwake = isAwake;
    this.isMoving = isMoving;
	  // return is not needed because the new object is returned by default
	}
  sleep() {
    this.isAwake = false;
  }
  wake() {
    this.isAwake = true;
  }
  sit() {
    this.isMoving = false;
  }
  walk() {
    this.isMoving = true;
  }
  speak(sound) {
    console.log(sound);
  }
  toString(animal = 'Animal') {
    return `This ${animal} has ${this.eyes} eyes and ${this.legs} legs. It ${this.isAwake ? 'is' : 'is not'} awake, and ${this.isMoving ? 'is' : 'is not'} moving.`;
  }
}

class Cat extends Animal {
  constructor(fur, isAwake, isMoving) {
    super(2, 4, isAwake, isMoving);
    this.fur = fur;
  }
  speak() {
    super.speak("Meow...");
  }
  toString() {
    return super.toString("Cat");
  }
}

class Dog extends Animal {
  constructor(fur, isAwake, isMoving) {
    super(2, 4, isAwake, isMoving);
    this.fur = fur;
  }
  speak() {
    super.speak("Woof!");
  }
  toString() {
    return super.toString("Dog");
  }
}

class Cow extends Animal {
  constructor(hair, isAwake, isMoving) {
    super(2, 4, isAwake, isMoving);
    this.hair = hair;
  }
  speak() {
    super.speak("Moo.");
  }
  toString() {
    return super.toString("Cow");
  }
}
Take note of the following:
- We changed the
toString()method ofAnimalto accept a parameter, but given it a default value for when we don't call it from our child classes. - We use
super()within the constructor to set properties more easily, and no longer needeyesorlegsas parameters for our child class constructors because they are consistent across child classes. Callingsuper()within the constructor will automatically call the parent's constructor method, but it must be called before any other references tothis. - We use
super.speak()withinspeakto avoid repetition. If we wanted to change how all animals speak, we could continue to do so within theAnimalclass. We do something similar withtoSpeak(). - If you wanted to completely change the
speak()ortoString()methods in these children classes, you could.
Now, if we wanted to instantiate our animals again, we could do the following:
const cat1 = new Cat("Orange", true, false);
const cat2 = new Cat("Black and White", false, false);
const dog1 = new Dog("Gold", true, true);
const cow1 = new Cow("Brown", true, false);
Everything should work as originally intended! Test the code by calling some of the methods on each animal and logging changes in properties.
Exercise
But wait! Aren't people animals, too?
Remember our original person example?
const person = {
  name: {
    first: 'Elyan',
    last: 'Kemble',
  },
  age: 32,
  location: {
    city: 'Garland',
    state: 'Texas',
    zip: 75040
  },
  occupation: 'Front-End Developer'
}

function introduce() {
  console.log(`Hello, my name is ${this.name.first} ${this.name.last}, and I'm a ${this.age}-year-old ${this.occupation} from ${this.location.city}, ${this.location.state}!`);
}
Using this example as inspiration, create a Human class that extends Animal. Think about how you could go about implementing the functionality above in the context of the already-created parent class. Could you add some of these properties to the Animal class? How would that change the structure of your other child classes?
Once you are finished, instantiate a Human and introduce() it to make sure your code works!
Note: you can extend the inheritance chain as far as you need to. Classes can have great-great-great grandparents if that makes sense for your use case. For example, we could say
class Developer extends Humanand create a class for all developers, which inherits fromHumanwhich inherits fromAnimal. We could then even sayclass FrontEndDeveloper extends Developer, and so on.
Encapsulation
The classes we've defined above still have some issues with them. For example, we have direct access to all of the properties of our animals, and can change them however we please. For example, we can just say cat1.eyes = "yellow" and nobody would know that's incorrect. Obviously, we inteded for the eyes property to hold the number of eyes, not the color (hint: maybe we should have been more descriptive with our property name!).
In order to deal with issues like this, we introduce another core OOP concept: Encapsulation.
Encapsulation is the ability for an object to decide what information is shows to the outside world and what information it keeps to itself. It also encourages methods that specify how certain properties are accessed or modified.
In order to implement encapsulation, we need public and private properties and methods. In JavaScript, all object properties and methods are public by default, which means they can be accessed from outside of the object itself. As an example, remember that we can directly access cat1.eyes from wherever we want.
Private properties, on the other hand, cannot be accessed externally. In order to create a private property, we must declare it using the # symbol at the top of the class definition (outside of the constructor). These declarations are called "hash names," since they use the hash prefix #. In legacy code, you may see private features created with underscores, _privateField, but these features will not behave as truly private.
To demonstrate this, we're going to abandon our previous Animal examples, create a simple Learner class, and instantiate it.
class Learner {
  #grades = [];
  #name = {
    first: '',
    last: '',
  }
  #age;

	constructor(firstName, lastName, age) {
		this.#name.first = firstName;
    this.#name.last = lastName;
    this.#age = age;
	}
}

const learner1 = new Learner('Leeroy', 'Jenkins', 18);
The private fields #grades, #name, and #age will not be accessible outside of the object itself. Attempting to access them will result in a SyntaxError.
Great! Now we've made thing inaccessible... how is that useful?
Let's provide controlled access using methods called getters and setters. Getters and setters do exactly what they sound like they do - get and set specific data. In order to create getters and setters, we use the get and set keywords.
In OOP, we use getters and setters to control exactly how specific data is accessed, modified, or deleted so that our objects behave predictably. Without encapsulation, we could do things like set the number of a cat's eyes to "yellow," after all! Encapsulation helps prevent bugs.
When creating objects, it's important to note that not every field needs a getter and/or a setter. If we did not need the ability to change a learner's name or age, for example, we could forgo those setters and simply create getters:
class Learner {
  #grades = [];
  #name = {
    first: '',
    last: '',
  }
  #age;

	constructor(firstName, lastName, age) {
		this.#name.first = firstName;
    this.#name.last = lastName;
    this.#age = age;
	}
  get name() {
    return this.#name.first + ' ' + this.#name.last;
  }
  get age() {
    return this.#age;
  }
}

const learner1 = new Learner('Leeroy', 'Jenkins', 18);
Now, we can access the learner's name and age using learner1.name and learner1.age, but we cannot modify the values. Try it!
Notice how we created get name() to return the concatenation of the first and last names? This is just a very simple example of how we can control how data is accessed; we do not need to always return the raw values of our properties.
Let's create a setter method for our #grades array. We don't want to set the value of #grades directly; instead, let's push values to the array as they are received. We also know that we want grades to be numbers, and that they should be between 0 and 100, so we can incorporate some data validation into our method!
class Learner {
  #grades = [];
  #name = {
    first: '',
    last: '',
  }
  #age;

	constructor(firstName, lastName, age) {
		this.#name.first = firstName;
    this.#name.last = lastName;
    this.#age = age;
	}
  get name() {
    return this.#name.first + ' ' + this.#name.last;
  }
  get age() {
    return this.#age;
  }
  set grades(grade) {
    // change the grade to a Number, in case it was provided as a String
    grade = Number(grade);
    // Only accept values between 0 and 100
    if (grade >= 0 && grade <= 100) {
      this.#grades.push(grade);
    }
  }
}

const learner1 = new Learner('Leeroy', 'Jenkins', 18);
We've run into a small problem - we can't test this, because we can't access #grades!
- Add a method
get grades()that returns the array of grades. -
Use
learner1.grades =to add some grades to the learner.- Notice that, since we made a custom setter method, the equals operator does not override the current
#gradesvalue, it adds to it.
- Notice that, since we made a custom setter method, the equals operator does not override the current
- Test that your code works properly by logging
learner1.grades.
What if we had a long list of grades to add all at once? We could create a loop that sets grades many times, and even turn it into a function so it could be reused, but wouldn't it be nice if our class included that functionality by default?
Below, we've removed our grades setter and created an addGrades() method since "addGrades" is more accurate and descriptive than .grades =. Take a moment to think about how this works, and if you would have approached it differently. As is often the case in programming, there are many correct answers.
  addGrades(...grades) {
    grades = grades.flat();
    grades.forEach((grade) => {
      grade = Number(grade);

      if (grade >= 0 && grade <= 100) {
        this.#grades.push(grade);
      }
    });
  }
Let's break down how this works:
- We use rest parameters to allow our grades setter to accept an indefinite number of arguments as an array.
-
We use the array method
flat()to "flatten" nested arrays.- This allows us to pass in a mixed list of arguments that can also include arrays, like
addGrades(98, 87, [95, 100, 77], [96, 89]), which will then be flattened to a single array that looks like[98, 87, 95, 100, 77, 96, 89].
- This allows us to pass in a mixed list of arguments that can also include arrays, like
- We iterate through the
gradesarray using the array methodforEach(). - We convert each grade into a number, again allowing us to accept string values.
- We check that the grade is between 0 and 100 before adding it to the object's
#gradesarray.
Through the power of encapsulation, we've created a method that allows us to modify the #grades array in a very controlled, very predictable manner. Without encapsulation, a user (or another programmer, or your future self) could come in and say learner1.grades[42] = "hi", and our program would fail.
In the same manner, we can control other ways our data is accessed. For example, if you wanted to get the average of this learner's grades, you might assume you could just add all of the grades from our getter method together and divide by the length of the array. In this case, however, the instructor has decided that everyone's lowest grade will be dropped from their average!
Here's how we might implement a method get average() to handle this:
  get average() {
    const arr = [...this.#grades];
    arr.sort((a, b) => a - b).shift();

    return arr.reduce((a, b) => a + b) / arr.length;
  }
A breakdown of how this works:
- Make a shallow copy of the
#gradesarray and store it inarr. -
Use
sort()to sortarrfrom lowest to highest value, and thenshift()the lowest value off of the front ofarr.- Note that we must pass a callback function into
sort()to override its default lexigraphical sorting behavior, otherwise 100 would come before 98 because "1" comes before "9" alphabetically.
- Note that we must pass a callback function into
- Use
reduce()to add all of the elements of the array together, and divide the result byarr.length. - Return the final value.
Here's a look at what our Learner class looks like up to this point:
class Learner {
  #grades = [];
  #name = {
    first: "",
    last: ""
  };
  #age;

  constructor(firstName, lastName, age) {
    this.#name.first = firstName;
    this.#name.last = lastName;
    this.#age = age;
  }
  get name() {
    return this.#name.first + " " + this.#name.last;
  }
  get age() {
    return this.#age;
  }
  addGrades(...grades) {
    grades = grades.flat();
    grades.forEach((grade) => {
      grade = Number(grade);

      if (grade >= 0 && grade <= 100) {
        this.#grades.push(grade);
      }
    });
  }
  get grades() {
    return this.#grades;
  }
  get average() {
    const arr = [...this.#grades];
    arr.sort((a, b) => a - b).shift();

    return arr.reduce((a, b) => a + b) / arr.length;
  }
}
Test the class by doing the following:
- Instantiate a new
Learner. - Log the learner's name and age.
-
Add the following grades using
addGrades():[95, 87, 66], "98", "100", -60, 88, 89, [100, 76, 88], 105
-
Log the current grades array and make sure it's what you expect.
- Remember that values less than 0 or greater than 100 should not be included.
- Calculate the average of these grades manually, keeping in mind that the lowest grade should be excluded from the calculation.
- Log the average returned from
.averageand compare the results with your calculations to ensure it is working properly.
Knowledge Check
❓ In your own words, describe the OOP principle known as encapsulation.
❓ What special character is used to declare private features in a class?
❓ What are some of the benefits of making properties of an object private?
❓ What are some of the benefits of creating custom getter and setter methods?
Aside: Planning Classes
Before we continue to the remaining two core OOP concepts, Abstraction and Polymorphism, we'd like to acknowledge that creating large, complex classes with children and parents and getters and setters and all of these other things can be a daunting task. While you can continue to add to and modify classes as the need for additional properties and methods arise, planning ahead can save you a lot of time and headache.
The pseudocode used to plan classes typically looks like this:
class Instructor
  properties
    name
    age
    teaches
  methods
    grade(assignment)
    introduce()
Keeping yourself organized will allow you to be a better developer. Don't forget about comments and documentation, too!
Abstraction
We already taught you abstraction, surprise! Abstraction is very closely related to encapsulation, and its main goal is to hide unnecessary details from the user of a class or object. Abstraction encapsulates the complexity of certain tasks, such that the user can accomplish tasks without worrying about how those tasks are being handled.
In our examples above, the addGrades() and get average() methods are good examples of abstraction. If you were handed the Learner class, pre-packaged, and told that you could pass grades into addGrades() to store them, and get the average with .average, that's all you would need to know! Everything within those functions is abstracted away from your view, so that you can focus on what you need to do with the results of those methods.
  addGrades(...grades) {
    grades = grades.flat();
    grades.forEach((grade) => {
      grade = Number(grade);

      if (grade >= 0 && grade <= 100) {
        this.#grades.push(grade);
      }
    });
  }
  get average() {
    const arr = [...this.#grades];
    arr.sort((a, b) => a - b).shift();

    return arr.reduce((a, b) => a + b) / arr.length;
  }
Every time you've used an array method like forEach(), or called Math.random(), you've interacted with abstraction.
A real-world example of abstraction, to help you further understand the concept, are cars. You interact with the "methods" the car exposes to you, like the ignition, steering wheel, accelerator, and brake pedal, but you don't need to interact with any of the complex operation behind the scenes. The Car class only exposes the start(), turn(), accelerate(), and brake() methods to you, while it keeps the inner workings of these things to itself.
There are two primary types of abstraction -- data abstraction and process abstraction.
Data Abstraction is the simplest form of abstraction, in which the original data entity is hidden by an externally-facing data structure. As users, we don't need to know what the original entity looks like or how it behaves, because we only interact with the externally-facing entity. A simple example of this is our get name() method from the Learner class, which abstracts the existance of the #name object and instead gives us a single string that includes both #name.first and #name.last:
  get name() {
    return this.#name.first + " " + this.#name.last;
  }
Process Abstraction deals with processes in the same way. The underlying implementation of certain processes are hidden, and we as users do not need to interact with those processes. addGrades() and get average() from the Learner class are examples of this (shown above).
Abstraction and encapsulation are easy to confuse because they are so closely related. Abstraction is the hiding of the details of data and process implementation, whereas encapsulation describes how abstraction occurs within the program.
Abstraction is a design-level concept, whereas encapsulation is an implementation-level concept.
Polymorphism
Polymorphism is the ability of a single thing to take on many forms (poly = many; morph = change form). In the context of OOP and JavaScript, this means the ability for one object to have multiple realizations that each implement the same functionality, but work in differrent ways.
Remember our Animal class examples? Here they are again:
class Animal {
	constructor(eyes, legs, isAwake, isMoving) {
		this.eyes = eyes;
    this.legs = legs;
    this.isAwake = isAwake;
    this.isMoving = isMoving;
	}
  sleep() {
    this.isAwake = false;
  }
  wake() {
    this.isAwake = true;
  }
  sit() {
    this.isMoving = false;
  }
  walk() {
    this.isMoving = true;
  }
  speak(sound) {
    console.log(sound);
  }
  toString(animal = 'Animal') {
    return `This ${animal} has ${this.eyes} eyes and ${this.legs} legs. It ${this.isAwake ? 'is' : 'is not'} awake, and ${this.isMoving ? 'is' : 'is not'} moving.`;
  }
}

class Cat extends Animal {
  constructor(fur, isAwake, isMoving) {
    super(2, 4, isAwake, isMoving);
    this.fur = fur;
  }
  speak() {
    super.speak("Meow...");
  }
  toString() {
    return super.toString("Cat");
  }
}

class Dog extends Animal {
  constructor(fur, isAwake, isMoving) {
    super(2, 4, isAwake, isMoving);
    this.fur = fur;
  }
  speak() {
    super.speak("Woof!");
  }
  toString() {
    return super.toString("Dog");
  }
}

class Cow extends Animal {
  constructor(hair, isAwake, isMoving) {
    super(2, 4, isAwake, isMoving);
    this.hair = hair;
  }
  speak() {
    super.speak("Moo.");
  }
  toString() {
    return super.toString("Cow");
  }
}

const cat1 = new Cat("Orange", true, false);
const cat2 = new Cat("Black and White", false, false);
const dog1 = new Dog("Gold", true, true);
const cow1 = new Cow("Brown", true, false);
We can call the same method, speak(), on each of the intances of these Animal objects, but it will behave differently. This is an example of polymorphism - common functionality with unique behavior. toString() is similarly polymorphic.
This particular type of polymorphism is referred to as inheritance-based polymorphism, because the differences in behavior are defined by the child classes.
The toString() method also demonstrates parameter-based polymorphism, because each string is different based on the parameters that were originally given to the constructor functions.
These types of polymorphism are also known as static polymorphism, because they are defined in the source code and happen before runtime. Dynamic polymorphism, which happens at runtime, is not typically seen in JavaScript because JS is not a strictly typed language.
Here's a simple example to explain the concept of dynamic polymorphism, but don't worry about this too much as you will only encounter it if you work with other programming languages. In this example, we are assigning data types to our variables. This is not a feature of JavaScript (but can be useful - TypeScript adds static typing to JavaScript), so this example will not run.
Cat cat1 = new Cat("Orange", true, false);
Animal cat2 = new Cat("Orange", true, false);
Animal cat3 = new Animal(2, 4, true, false);
In this example, we create an Animal object using the Cat constructor, which is a child of Animal. In a language that supports this, it would lead to some interesting runtime behavior. Our cat2 object would use the Cat properties and methods, even though it uses an Animal reference.
Another way to demonstrate this particular type of polymorphism is the instanceOf operator. The instanceOf operator in JavaScript allows us to compare an object's origins with a given class. It does this by looking at the object's prototype chain, which we will discuss later.
For example:
console.log(cat1 instanceOf Cat); // true
console.log(cat1 instanceOf Animal); // true
console.log(cat1 instanceOf Object); // true
console.log(cat1 instanceOf Dog); // false
One of the classic examples of polymorphism is a Shape class, and those classes that would inherit from it, like Circle, Square, and Triangle.
Without polymorphism, we would create separate drawing functions for each child class. Circle would have drawCircle(), Square would have drawSquare(), and Triangle would have drawTriangle(). Instead, we can just create a single polymorphic draw() function that behaves differently for each object. Therefore, we can call shape.draw(), circle.draw(), square.draw(), and triangle.draw().
Static Properties and Methods
So far, we've been instantiating all of our examples in order to work with them, but we know from experience that this is not always necessary. The Math.random() method, which we have mentioned before, does not require an instance of the Math class in order to be called. Similarly, the property Math.PI can be accessed without instantiation.
These are called "static" properties and methods.
- Static methods are often used to create utility functions that perform actions that are independant of the state of an individual object.
- Static properties are useful for caches, fixed-configuration values, or other data that does not need to be replicated across each instance of the class's objects.
What kind of static properties and methods could we add to our example classes? Remember, static features need to be independant of the state of individual objects. Looking at our Animal code, we already have a method like this: speak().
class Animal {
  static speak(sound) {
    console.log(sound);
  }
}

class Cat extends Animal {
  static speak() {
    super.speak("Meow...");
  }
}

class Dog extends Animal {
  static speak() {
    super.speak("Woof!");
  }
}

class Cow extends Animal {
  static speak() {
    super.speak("Moo.");
  }
}
Now, we can see what different types of animals say without having to create instances of their classes!
Animal.speak("Cluck cluck."); // => Cluck cluck.
Cat.speak(); // => Meow...
Dog.speak(); // => Woof!
Cow.speak(); // => Moo.
While this isn't the most practical application, as we've effectively just turned Animal.speak() into console.log(), it demonstrates the basic principle of creating a static method.
Let's look at a more practical example. Say that we wanted to get the average of a set of grades without needing to instantiate a Learner object and assign all of the grades to that specific learner. Let's create a Grades class with a single static method that will look very familiar:
class Grades {
  static getAverage(...grades) {
    const arr = [];

    grades = grades.flat();
    grades.forEach((grade) => {
      grade = Number(grade);

      if (grade >= 0 && grade <= 100) {
        arr.push(grade);
      }
    });

    arr.sort((a, b) => a - b).shift();

    return arr.reduce((a, b) => a + b) / arr.length;
  }
}
Now we can use Grades.getAverage() to calculate the average of an arbitrary list of grades without instantiating or affecting the state of any Learner objects.
We could take this example one step further - what if you continued to expand the Grades class such that it had its own constructor, private array of grades, getters, and setters? We could then remove all of this logic from our Learner class and instead instantiate a Grades object within the Learner class in order to hold and interact with that data.
What would be the benefits of doing this? What are the downsides?
Here's what that might look like:
class Learner {
  #grades;
  #name = {
    first: "",
    last: ""
  };
  #age;

  constructor(firstName, lastName, age) {
    this.#name.first = firstName;
    this.#name.last = lastName;
    this.#age = age;

    this.#grades = new Grades();
  }
  get name() {
    return this.#name.first + " " + this.#name.last;
  }
  get age() {
    return this.#age;
  }
  addGrades(...grades) {
    this.#grades.addGrades(grades);
  }
  get grades() {
    return this.#grades.grades;
  }
  get average() {
    return this.#grades.average;
  }
}

class Grades {
  #grades = [];

  constructor(initialGrades) {
    if (initialGrades) {
      this.addGrades(initialGrades);
    }
  }
  static getAverage(...grades) {
    const arr = [];
    this.addToArray(arr, grades);
    return this.avgArray(arr);
  }
  static addToArray(arr, grades) {
    grades = grades.flat();
    grades.forEach((grade) => {
      grade = Number(grade);

      if (grade >= 0 && grade <= 100) {
        arr.push(grade);
      }
    });
  }
  static avgArray(gradeArray) {
    const arr = [...gradeArray];
    arr.sort((a, b) => a - b).shift();

    return arr.reduce((a, b) => a + b) / arr.length;
  }
  addGrades(...grades) {
    Grades.addToArray(this.#grades, grades.flat());
  }
  get grades() {
    return this.#grades;
  }
  get average() {
    return Grades.avgArray(this.#grades);
  }
}
Take a few minutes to analyze the changes made to these two classes, and try to determine the reasoning behind each of them. Copy the code and test it for yourself to see how the functionality may have changed or expanded.
While this may or may not seem practical, it does demonstrate a very common occurence in development. You will often be given tools like packages, modules, and classes that already handle some of the functionality you are looking to implement, but you need to integrate them with your own work. In the above example, if we were given the Grades class and told how its methods worked, it would certainly inform our decision-making process when creating the Learner class, since there would be no reason to recreate those methods from scratch.
Object Prototypes
We're going to go full-circle and talk about inheritance again, using prototypes.
Prototypes are the way in which JavaScript objects inherit features from one another, and are directly linked to the OOP concept of inheritance. If we go to the browser console and create a simple empty object literal, you will see that it contains many additional properties and methods that we did not create. Why is that?
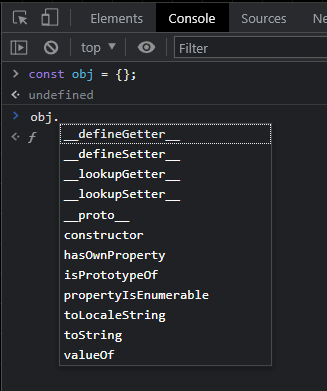
All objects in JavaScript inherit from a prototype. By default, this prototype is the Object prototype, which has the properties and methods you see above. We have already seen this with the existance of the toString() method, which we overrode in previous examples.
Since every object has a prototype, object inheritance creates a prototype chain that eventually leads all the way up to Object itself. Let's revisit our animal example to demonstrate the prototype chain:
class Animal {}
class Cat extends Animal {}
class Tabby extends Cat {}
class SpottedTabby extends Tabby {}

const cat1 = new SpottedTabby();
let object = cat1;

do {
  object = Object.getPrototypeOf(object);
  console.log(object);
} while (object);
We use the Object.getPrototypeOf() static method to get the object's prototype. This code block will log every prototype up the chain, giving you a view of the object's inheritance; try it!
When you try to access a property or method of an object and it isn't found, JavaScript searches that object's prototype for the property or method. If it still isn't found, it continues up the prototype chain until the property is found or the end of the chain is reached, in which case it returns undefined.
Prototypes are the method by which JavaScript enables inheritance.
Knowing this, we can directly assign properties and methods to an object's prototype in order to affect all instances of that object. For example, assume we forgot to set a Breed property on our Tabby class, and now we have a bunch of SpottedTabby running around with no breed identifier. We can fix this using prototypes!
class Animal {}
class Cat extends Animal {}
class Tabby extends Cat {}
class SpottedTabby extends Tabby {}

const cat1 = new SpottedTabby();
const cat2 = new SpottedTabby();
const cat3 = new SpottedTabby();
const cat4 = new SpottedTabby();

console.log(cat1.breed); // undefined
console.log(cat2.breed); // undefined
console.log(cat3.breed); // undefined
console.log(cat4.breed); // undefined

Object.getPrototypeOf(cat1).breed = "Tabby";

console.log(cat1.breed); // Tabby
console.log(cat2.breed); // Tabby
console.log(cat3.breed); // Tabby
console.log(cat4.breed); // Tabby

// New instance has the same prototype.
const cat5 = new SpottedTabby();
console.log(cat5.breed); // Tabby

// Setting this directly on this instance.
cat5.breed = "Tabby";

delete Object.getPrototypeOf(cat1).breed;

console.log(cat1.breed); // undefined
console.log(cat2.breed); // undefined
console.log(cat3.breed); // undefined
console.log(cat4.breed); // undefined
// We only deleted the prototype's value,
// this instance still has its value.
console.log(cat5.breed); // Tabby
As you will see in the example, we can also remove properties from prototypes using the delete keyword.
Being able to manipulate prototypes is useful because you may not always know what kinds of features your classes need until runtime. Being able to change a property or method of every single instance of a class by manipulating its prototype can be quite convenient.
You can also set an object's prototype. Sometimes, you will not have access to the class you want to inherit from, and therefore cannot make use of the extends keyword. There are multiple ways around this.
Object.create(obj) creates a new object with the parameter obj as its prototype:
const commPrototype = {
  introduce() {
    console.log("Hey there, I don't have a name because I'm just an example, but nice to meet you!");
  }
};

const person = Object.create(commPrototype);
person.introduce(); // Hey there, I don't have a name because I'm just an example, but nice to meet you!
As a more universal solution, we can directly assign the prototype of a constructor function using Object.assign() or the .prototype property:
const commPrototype = {
  introduce() {
    console.log(`Hey there, I have a name now! I'm ${this.name}!`);
  }
};

function Person(name) {
  this.name = name;
}

Object.assign(Person.prototype, commPrototype);
// or
// Person.prototype.introduce = commPrototype.introduce;

const person = new Person("Leo");
person.introduce(); // Hey there, I have a name now! I'm Leo!
Working with prototypes opens up a world of flexibility when dealing with objects and classes.
As a final example, let's assume we're working with arrays all over our codebase, and we very commonly need to determine the minimum or maximum value within the array. We could do this:
const arr = [3, 8, 1, -10, 90, 77, 42];
const min = Math.min(...arr);
const max = Math.max(...arr);
While this wouldn't be so bad, we could instead modify the Array prototype itself to include a function for this!
Array.prototype.min = function () {
  return Math.min(...this);
};
Array.prototype.max = function () {
  return Math.max(...this);
};

const arr = [3, 8, 1, -10, 90, 77, 42];
const min = arr.min();
const max = arr.max();
We can even call this directly on array literals:
console.log([10, 20, 0, -30, 50, 100].min()); // -30Generally speaking, you should be very careful when extending base classes, as this can conflict with libraries and packages that attempt to do the same thing.
Though this example doesn't save us too many keystrokes, it demonstrates the power of prototype extension. Imagine adding a function that wasn't so simple and being able to use it across all instances of an object type, just like that!
Object Factories
So far, we've been creating objects using class templates and constructor functions, but there is one other option available: factories.
A factory function is a function that returns an object. By creating objects with factories, we avoid the use of the new keyword. Generally speaking, factories are wonderful for creating copies of simple objects, but lose out on much of the flexibility of working with classes as complexity increases.
Objects created by factories also do not benefit from the prototype chain, as they are simple objects.
Here's an example factory function, and how it could be written with a constructor function instead:
// Factory Function
const learnerFactory = (firstName, lastName, age) => {
  const introduce = () => console.log(`Hi, I'm ${firstName} ${lastName}!`);
  return { name: (firstName + ' ' + lastName), age, introduce }
};

const learner1 = learnerFactory('John', 'Seen', 46);

// Constructor Function
const Learner = (firstName, lastName, age) => {
  this.name = firstName + ' ' + lastName;
  this.age = age;
  this.introduce = () => console.log(`Hi, I'm ${firstName} ${lastName}!`);
};

const learner2 = new Learner('Ed', 'Dantes', 23);
Since factory functions are just functions that return objects, they can have "private" features just like classes, thanks to scope!
Conclusion
Object-Oriented Programming is one of the most useful programming paradigms, as it allows for modularity, scalability, and organization through the use of inheritance, encapsulation, abstraction, and polymorphism.
As you continue your programming journey, look for opportunities to use OOP to make your code cleaner and more efficient!
Classes Labs
Now that you've learned about using classes and other functions in JavaScript to create objects, it's time for some practice!
First, complete the guided lab GLAB 308A.2.1 - Objects and Orcs. Have fun with it!
Once you're done with the above guided lab, complete the assignments: