
320H.5 - Interactive React Components
Learning Objectives
By the end of this lesson, learners will be able to:
- Create interactive components using event handling functions.
- Describe the properties of state across interactive components.
- Describe the "trigger, render, commit" process that React undergoes with each state change.
- Explain the behavior of hooks during the "trigger, render, commit" process.
CodeSandbox
This lesson uses CodeSandbox as one of its tools.
If you are unfamiliar with CodeSandbox, or need a refresher, please visit our reference page on CodeSandbox for instructions on:
- Creating an Account
- Making a Sandbox
- Navigating your Sandbox
- Submitting a link to your Sandbox to Canvas
Handling Events
As we have already seen, React allows you to add event handlers to your JSX expressions. Many built-in React components support their associated browser events (like onClick) by default, but you can always give your components' event handler props any names that you would like.
For example, if we wanted to create a toolbar component with two buttons that accomplished unique tasks, we could create onEvent props with descriptive names for the events happening within the component. Here's a demonstration of this from the React documentation:
This is also a form of abstraction. onPlayMovie and onUploadImage are really just button onClick events, but a developer working with the Toolbar component can quickly tell at a glance what functions they should pass to each of these props without disecting the internal code. As components grow in size and complexity, keeping things descriptive will help speed up development time and reduce bugs.
If the function handling our event was static, we would not need to pass it as a prop to the component. Instead, we could define the handler inside the component itself.
Here's a Button component that displays a simple alert every time it is clicked:
export default function Button() {
  function handleClick() {
    alert('You clicked me!');
  }

  return (
    <button onClick={handleClick}>
      Click me
    </button>
  );
}
While events are prepended with on by convention, their handling functions are prepended with handle. An onClick event would be handled with the handleClick function, and so on. This is why you will very often encounter things like onMouseEnter={handleMouseEnter} within code.
You can also choose to define these handler functions inline with the JSX:
<button onClick={function handleClick() {
  alert('You clicked me!');
}}>
Or using an anonymous arrow function:
<button onClick={() => {
  alert('You clicked me!');
}}>
For short functions, inline inclusion may make sense. As functions grow in length and complexity, moving them elsewhere will help keep your code clean and concise.
Just like in basic JavaScript, it is important that you pass the function definition, not the function call, into an event listener. This is a very common mistake made when passing arguments into an event handling function, because it is easy to change the syntax from onClick={handleClick} to onClick={handleClick(args)}, but the latter will not work as expected!
In contrast to the examples above, the below would cause alert('You clicked me!') to fire when the component renders, not when it is clicked:
<button onClick={
    alert('You clicked me!');
}>
You can also take arguments for your event handlers as props to the component containing them. Let's take another look at an example from the React documentation:
This example looks very similar to the first one, except the Button component has become more specific in its functionality - it is an AlertButton, and takes the message to be alerted as one of its props. It is very common to create components like this that handle specific tasks, so that we do not have to rewrite event handling functions every time a component is created.
Remember the original Toolbar component from the first example? Here's how we created it in the App export:
<Toolbar
    onPlayMovie={() => alert('Playing!')}
    onUploadImage={() => alert('Uploading!')}
/>
Both of the Button components inside of Toolbar are simply alerting something. If this is consistent, shared behavior, perhaps we should consider making them AlertButton like in the example above, which would reduce the need to repeat ourselves.
On the other hand, it is important to have a Button that takes an onClick prop which allows us to pass in a custom handler function, because it is very likely that we will use buttons everywhere and they will need to have unique behavior.
It is common to have components that are structured in this way. Components like Button may contain styling, but no specific behavior, and other components like PlayButton, UploadButton, SubmitButton, etc. will implement specific functionality on top of that styled foundation. If this feels a lot like class-based inheritance, that's because it is a lot like class-based inheritance. You can think of it in a similar way when designing components.
Below is an example illustrating this concept. In this example, all Button components have the "button" CSS class, and PlayButton and UploadButton just define onClick behavior for a Button.
Try changing the CSS for the .button class in styles.css and watch it affect both the PlayButton and UploadButton.
When handling events in React, remember that normal JavaScript rules apply. For instance, events propogate or "bubble" up the component tree in the same way that they would bubble up the DOM tree (because components get converted to DOM objects).
Methods like event.stopPropogation() and event.preventDefault() are still necessary for handling their use cases in React.
Events and State
In the previous lesson, we discussed some examples of using state alongside event handlers. All of the information above also applies to working with state.
You can pass state as a prop to use state information in an event handling function, and you can use the setState function in handlers to modify the state.
When working with state, it is important to remember that state is local, isolated, and private. A component that owns state can be rendered multiple times, and changes to one of its instance's state will not affect the other.
Here's an example of this in action. Notice how each PlayButton owns its own state, and is unaffected by interactions with the other PlayButton components.
Working with state is one of the most important abilities to master as a React developer, so we will continue to revisit it on occasion as new concepts that interact with state are dicussed.
Rendering and Committing
As all of these changes occur due to interaction with our components, those changes are magically rendered by React. Except they aren't magic, and understanding how React handles component display can help you think about how your code executes, and improve your ability to not only explain its behavior but also create more efficient applications.
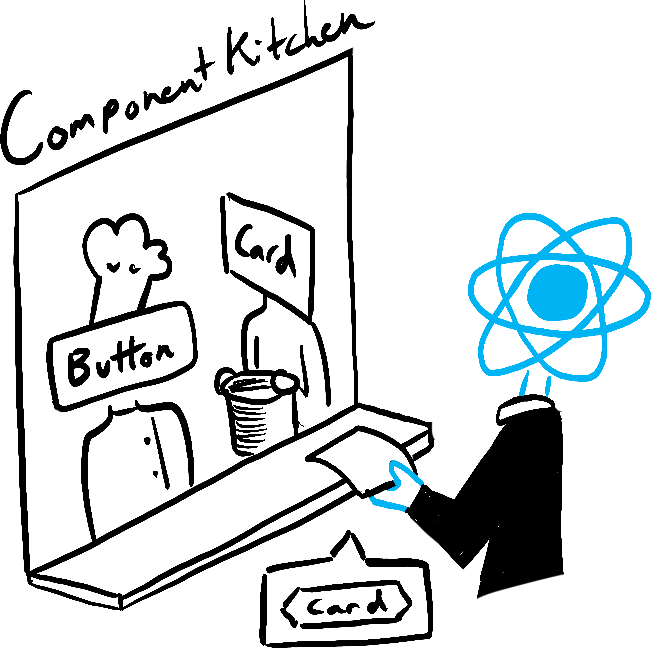
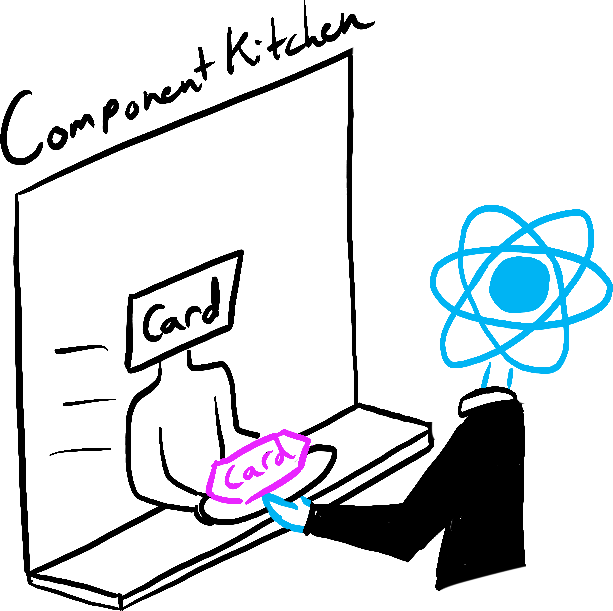
Here's a neat little comic and explanation from the React documentation to help you understand the "Trigger, Render, Commit" process that React undergoes when components are requested and eventually rendered:
"Imagine that your components are cooks in the kitchen, assembling tasty dishes from ingredients. In this scenario, React is the waiter who puts in requests from customers and brings them their orders. This process of requesting and serving UI has three steps:
- Triggering a render (delivering the guest’s order to the kitchen)
- Rendering the component (preparing the order in the kitchen)
- Committing to the DOM (placing the order on the table)"
 ➙
➙
 ➙
➙
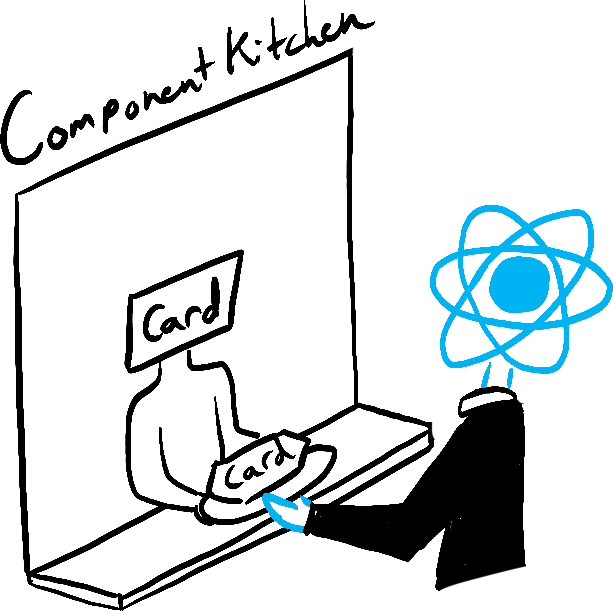
Triggering a render happens in one of two ways: either the component triggers its initial render, or the component's (or one of its ancestors') state is updated. The initial render is often hidden by frameworks, but it does need to be manually triggered.
Here's what the initial trigger looks like:
import { StrictMode } from "react";
import { createRoot } from "react-dom/client";

import App from "./App";

const rootElement = document.getElementById("root");
const root = createRoot(rootElement);

root.render(
  <StrictMode>
    <App />
  </StrictMode>
);
You may see many variations of this, and have likely already come across it when exploring some of the example code's index.js files or within your own sandboxes. This code is triggering the initial render by giving our entire application's JSX to the DOM's root node and calling its render method, provided by react-dom/client.
In the vast majority of cases, this initial render is already setup for you, and does not need to be updated as the application evolves.
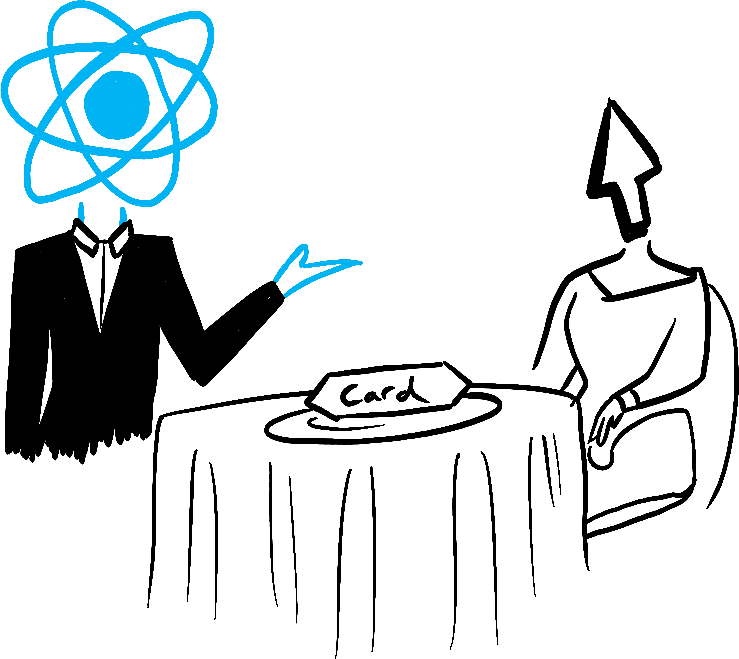
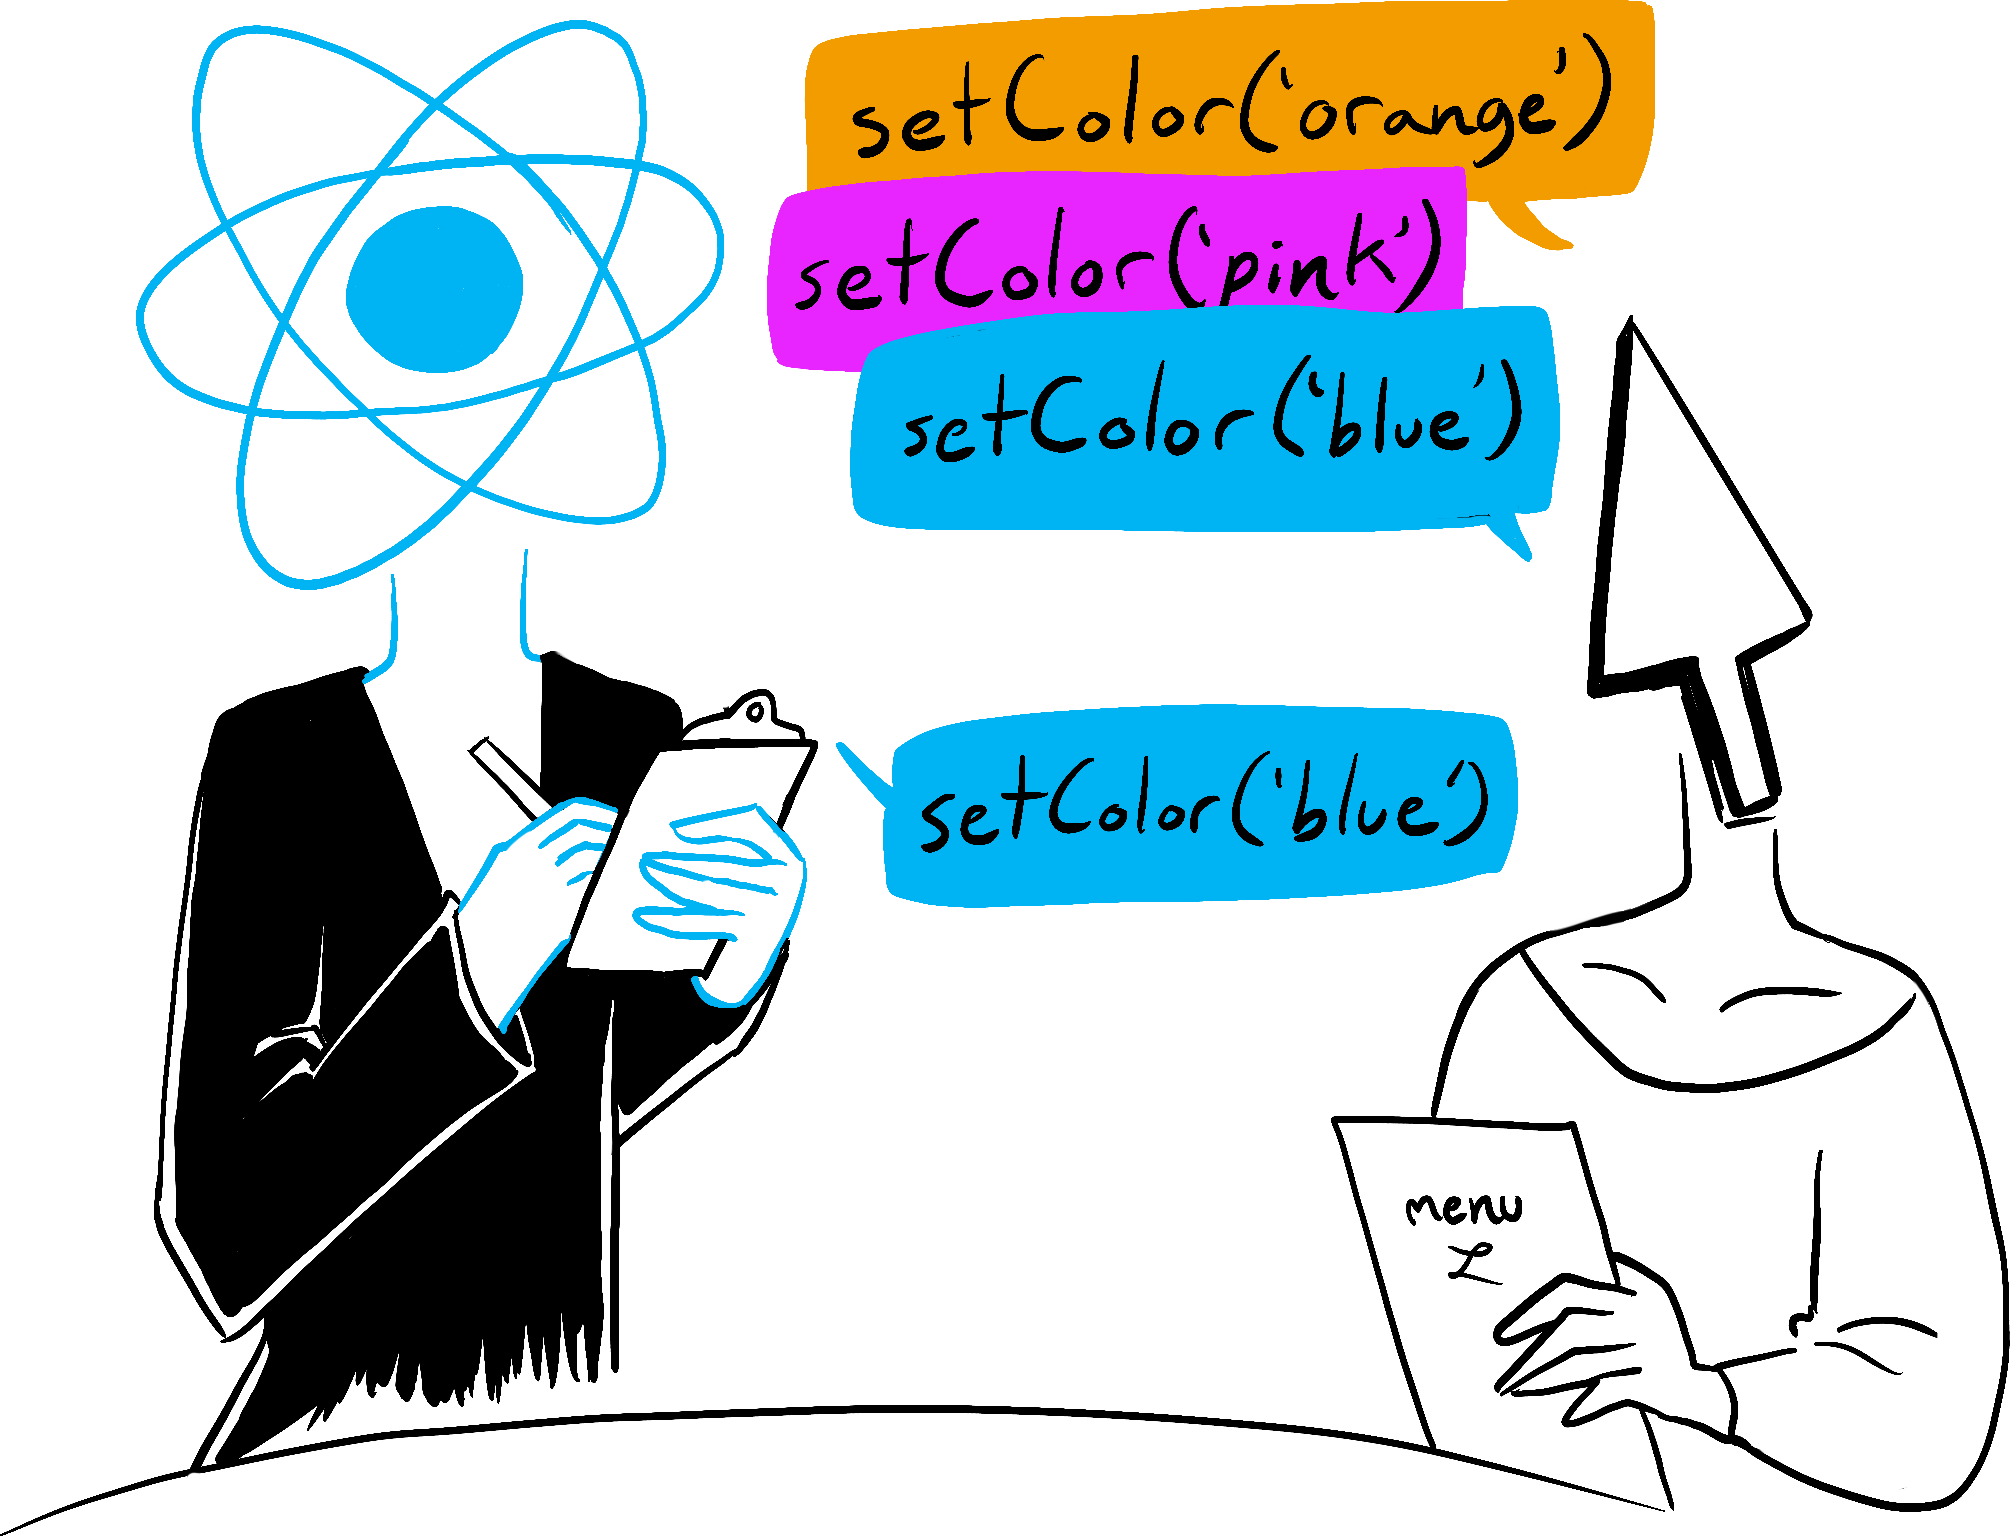
Once the initial render has been completed, additional renders are triggered any time the state changes by way of the set function. Here's another comic from the React team to illustrate this:
"Updating your component’s state automatically queues a render. You can imagine these as a restaurant guest ordering tea, dessert, and all sorts of things after putting in their first order, depending on the state of their thirst or hunger."
 ➙
➙
 ➙
➙
After triggering a render, React calls your component functions to determine what to display. If the updated component returns some other component, React will continue down the chain recursively until it runs out of nested components to render.
During the initial Render, React creates DOM nodes for each of the components. During any re-renders, React calculates the differences in those nodes' properties, if any, but does not do anything with that information until the "commit" phase.
Due to the way this process works, rendering, and components, must always be pure. For a given state input, the outputs must always be the same. This means you should avoid random behavior and unintended side effects within your components, otherwise React may not know how or when to re-render them! Remember: same inputs, same outputs.
Notice the StrictMode component that wraps App in the initial render above? While developing in Strict Mode, React calls each component's function twice and compares the results, which helps prevent bugs and mistakes called by impure functions. If those two calls don't match one another - error!
During commits, React makes actual modifications to the DOM.
For the initial render, this is as simple as calling appendChild() for each of the DOM nodes it has created to place them on screen.
For subsequent re-renders, React calculates the minimal necessary operations to make the DOM match the latest rendering output. These calculations are done during the rendering phase, and applied during the commit phase. If there is no difference in individual DOM nodes between renders, React will not change them. This makes React very efficient in its rendering process (most of the time). React also provides additional optimization tools for the few times that it re-renders too ambitiously, but we'll discuss more on that later.
Lastly, after React has finished its job, the browser itself will repaint the screen. This process is known as "browser rendering," but since React talks about "rendering" so often, it is typically referred to as "painting" in the context of a React application.
Each of these steps is executed every single time something in your application's state changes, whether due to API updates or user interaction. React does all of the heavy lifting for us, but understanding the process is an essential part of being a good React developer.
Aside: Hooks
As a reminder, this is the initial definition we provided for "hooks" a few lessons ago:
- Any function starting with "
use" is called a hook, which is a special function only available while React is rendering. They let you "hook into" different React features.
Now that you are familiar with the process React undergoes when state changes, and what "rendering" is in the context of React, let's re-examine one of the interactive useState examples provided in a previous lesson:
If you remember, the nextNextIndex() function is broken. Despite calling setIndex(index + 1) twice, the index state is only incremented by one.
Now, we know why: hooks calculate during renders and are not recalculated until the next render. This behavior is referred to as "batching," because it calculates all of the state values in one batch, without checking for additional updates that happen while rendering. During the rendering process, React replaces references to index with the current state value, so our nextNextIndex() function actually looks like this:
function nextNextIndex() {
    setIndex(0 + 1);
    setIndex(0 + 1);
}
React waits for all code in the event handlers to run before processing state updates. The workaround for this was creating updater functions that use the state value. These updater functions are put into a queue, and that queue is processed during the render, allowing React to see the updated state values:
function nextNextIndex() {
    setIndex((i) => i + 1);
    setIndex((i) => i + 1);
}
As you may have imagined, the React team has an analogy for this as well:
"This might remind you of a waiter taking an order at the restaurant. A waiter doesn’t run to the kitchen at the mention of your first dish! Instead, they let you finish your order, let you make changes to it, and even take orders from other people at the table."
"This lets you update multiple state variables—even from multiple components—without triggering too many re-renders. But this also means that the UI won’t be updated until after your event handler, and any code in it, completes. This behavior, also known as batching, makes your React app run much faster. It also avoids dealing with confusing “half-finished” renders where only some of the variables have been updated.
React does not batch across multiple intentional events like clicks—each click is handled separately. Rest assured that React only does batching when it’s generally safe to do. This ensures that, for example, if the first button click disables a form, the second click would not submit it again."
Conclusion: Reactive React
Making React "reactive" is... the entire idea behind React. Adding interactivity and providing a positive user experience are part of the core and fundamental goals of React, so it makes sense that it handles a lot of the heavy-lifting for its developers.
As you build React applications, focus on how to integrate your knowledge of core JavaScript fundamentals with the tools provided by React. Here's a recap of the core concepts surrounding interactivity in React that we've discussed in this lesson:
- Event handlers can be included inside of components, passed as props by parents, or have arguments passed as props by parents for varying levels of control and customization.
- Sometimes separating styled components from their functional counterparts can help you create a more robust library of reusable components.
- Each component's state is private and isolated from other components (and copies of itself), so making changes to one component should not alter any others.
- React goes through a three-step process to display components: trigger, render, and commit.
- React hooks are called during the rendering process, and state is not recalculated during a render unless it is being read by queued functions.
Always keep in mind how the interactive elements are handled in the background, and seek to optimize your application to take advantage of these principles.